
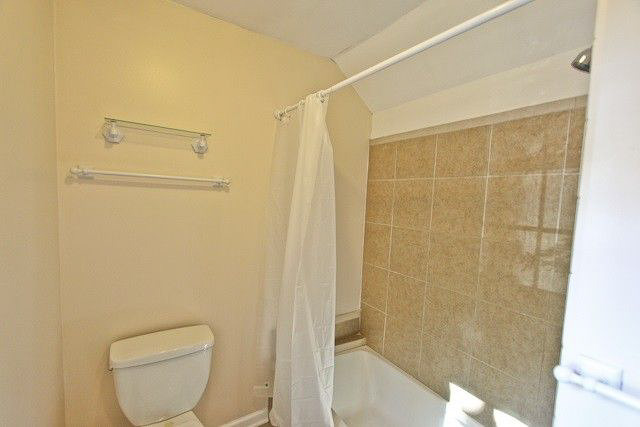
When we were house hunting back in 2017-2018 I absolutely had a checklist. That checklist was as follows- laundry room, dining room, 2 full bathrooms (at the least), and acreage. We were so fortunate that our home became available and we settled in June of 2018. Did our home have all the criteria? Yes. Did that criteria meet my standards? No. That was okay! I was excited to make each and every room feel like ours and put my personal touch on everything. Our downstairs bathroom is not only mainly for our kids but our guests too (it is the only bathroom on the main floor). Boy, did it need a major makeover! It was bad- I’m talking flesh colored walls, 80’s style shelving, old and damaged vanity, and a nautical looking mirror. Yikes! We had to live with it like that for some time because I was going to give birth in October and after doing the nursery I just wanted to relax before taking on another project. It wasn’t until September of 2019 that I was ready to take this bathroom renovation on.
As with any project, the first thing one typically does is chooses a paint color. This bathroom is a pretty descent size & it has a window that allows for a lot of natural light. That being said, I was thinking I wanted to go with a darker paint color. With ample natural light and the size of the room I felt as though I could get away with a dark color without it feeling too cramped or stuffy. Basically I came across a pinterest page that summed up tons of greige paint colors & was able to narrow it down from there. I decided on Sherwin Williams Anew Gray. I had Lowe’s color match it for me and got to work.
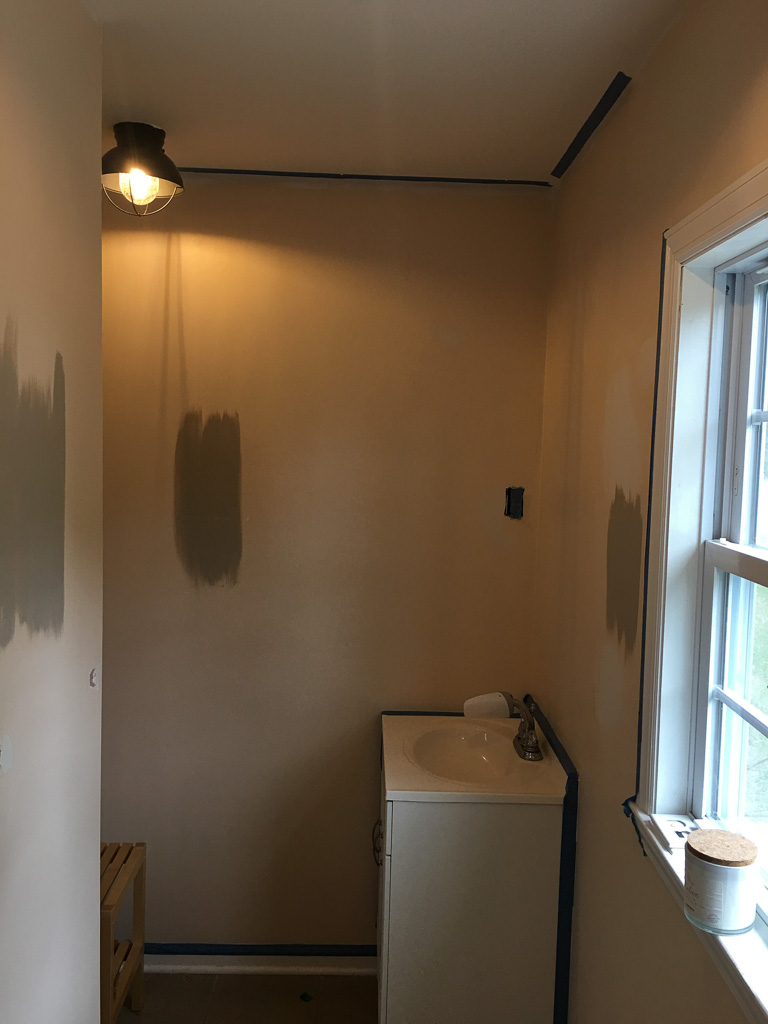
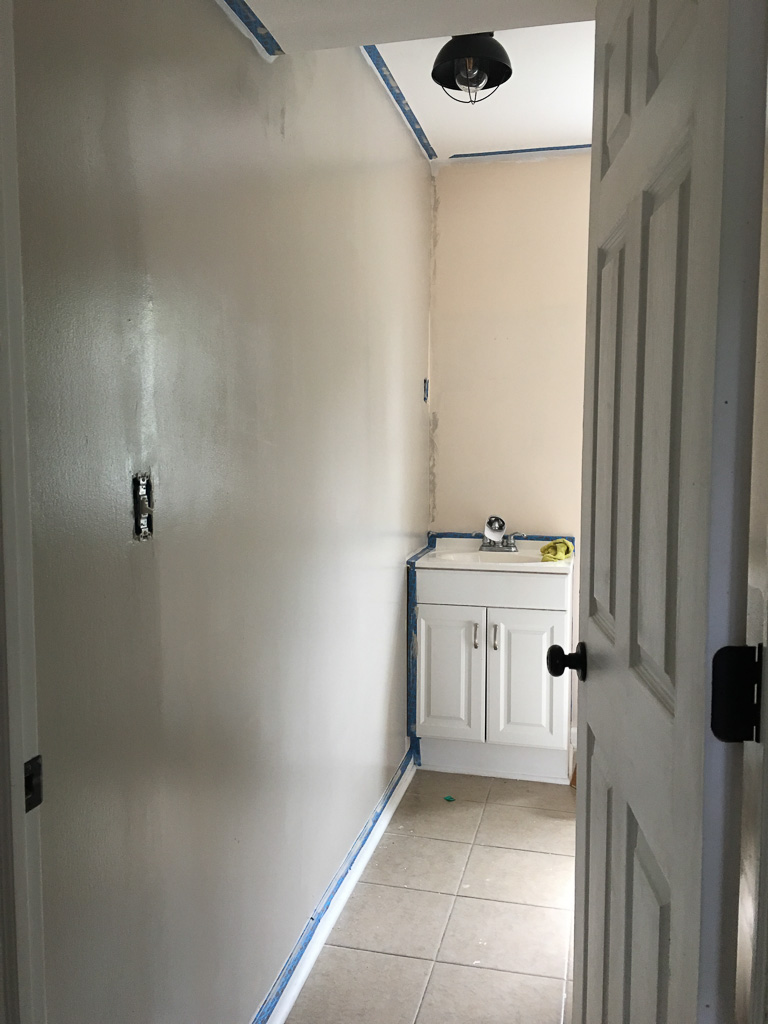
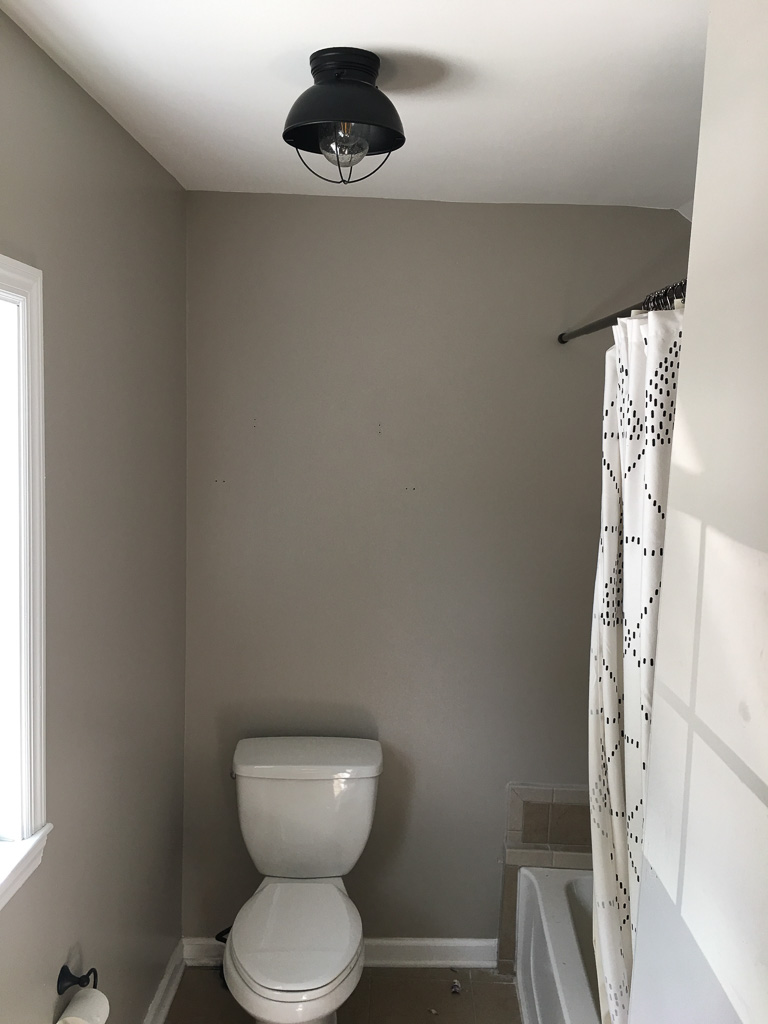
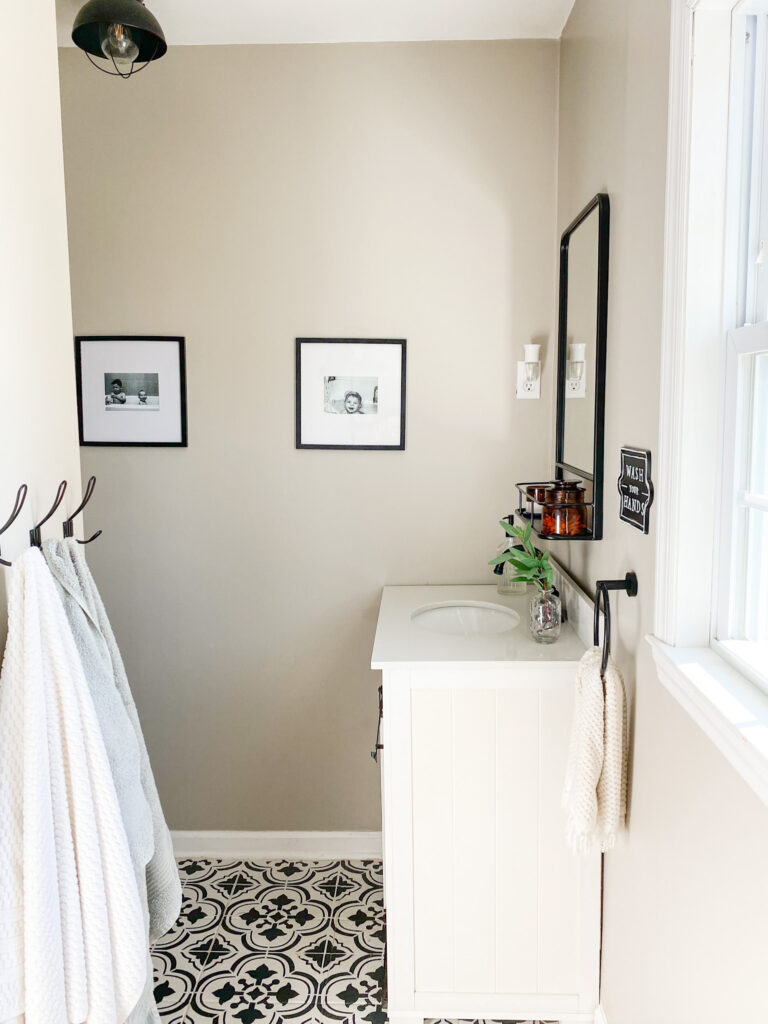
By the time I started painting we had already installed the new light fixtures. Also, by “we” I mean a local electrician- Once everything was painted I was seriously LOVING the contrast of the walls with the matte black light fixtures and the white trim. It was all coming together! The power of paint is a real thing, btw. Notice how I taped off the vanity? No clue why I did that-knowing we would be installing a new one.
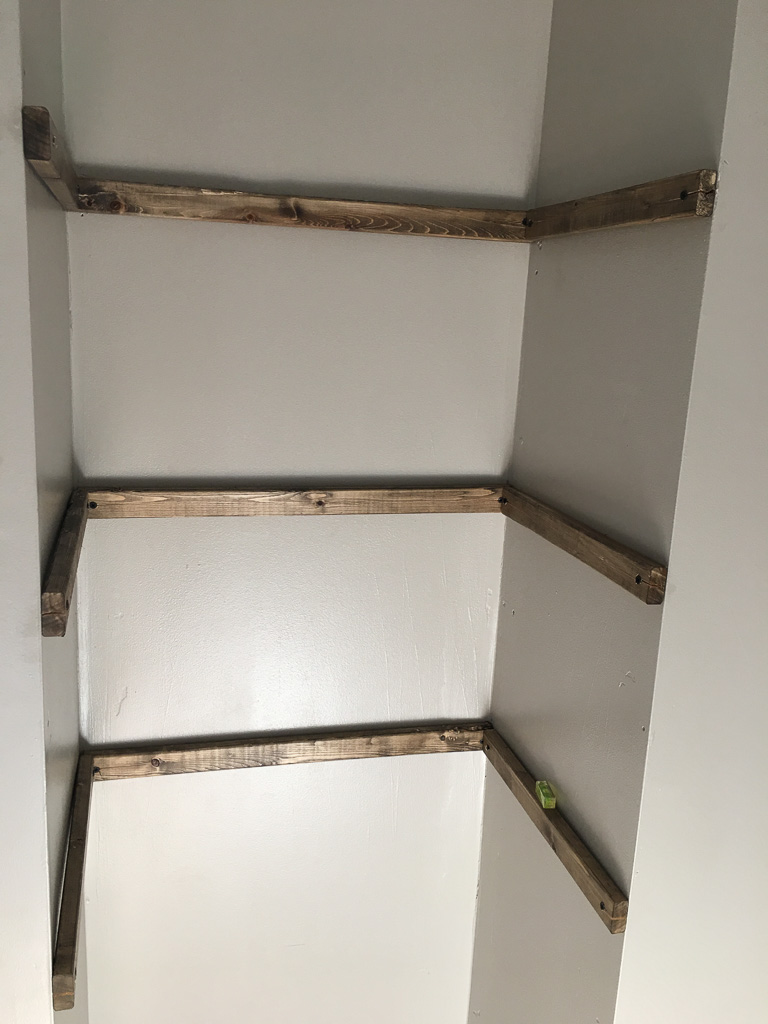
After painting, I started to build new shelves for the open linen closet. The previous shelves were your typical white wire ones that are anything BUT nice to look at. Because the closet is open (no door), I really wanted to have shelves that looked like they added to the décor on top of being functional. I am in no means a know-it-all when it comes to power tools, but there are a few I can wrap my head around to get the job done. I wanted 3 shelves total- toilet paper, storage, and towels. I also wanted there to be enough room between the floor and the bottom shelf for a hamper. After deciding on all of that, I pretty much winged it. I bought a couple pieces of 1x2s at The Home Depot and project plywood. After a lot of measuring (each shelf was different thanks to our old home and wonky walls) and finishing the cuts- it was time to stain. Special Walnut is usually my go to, but for some reason I was feeling Jaco Bean. Truth be told, if I ever re-do these shelves I will be going with something other than Jaco Bean. It just isn’t my favorite, BUT it still looks great! You want to always stain after making your cuts to be sure to get any raw edges. I used screws to secure the supports to the wall and Dan helped me assemble the tops with our nail gun (nail guns are intimidating, am I right?) They turned out so good and were 100% better than the OG shelves.

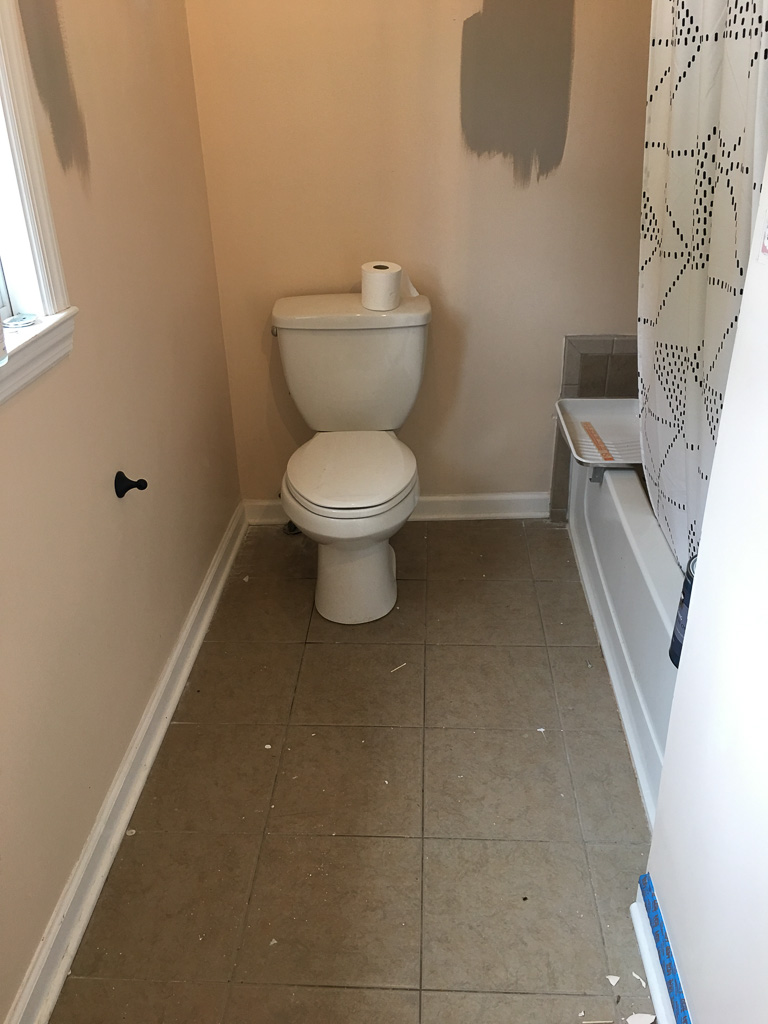
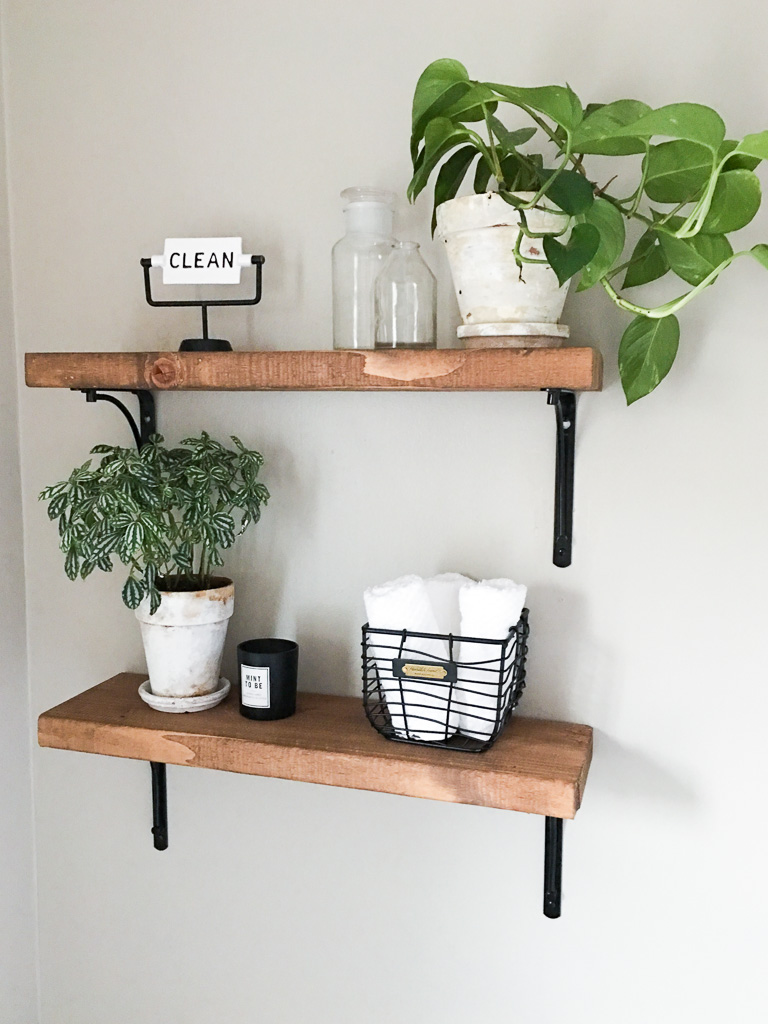
Slowly but surely this bathroom was finally becoming something I was happy to walk past each day! Mind you- none of this happened over night. This bathroom took us about a month to fully finish. The shelves that were originally behind the toilet were actually worse than the OG linen closet ones. They were glass with like white rods and then a random towel holder above the toilet? very strange. Not only were they ugly, they were attached to the wall with such force that they caused serious damage to the drywall after I meticulously removed them. I used the 3M patching and repair compound, and it worked great! I built new shelves for over the toilet with 2×8 pine boards (stained in special walnut) and brackets. I loved getting to decorate them with houseplants and simple items.
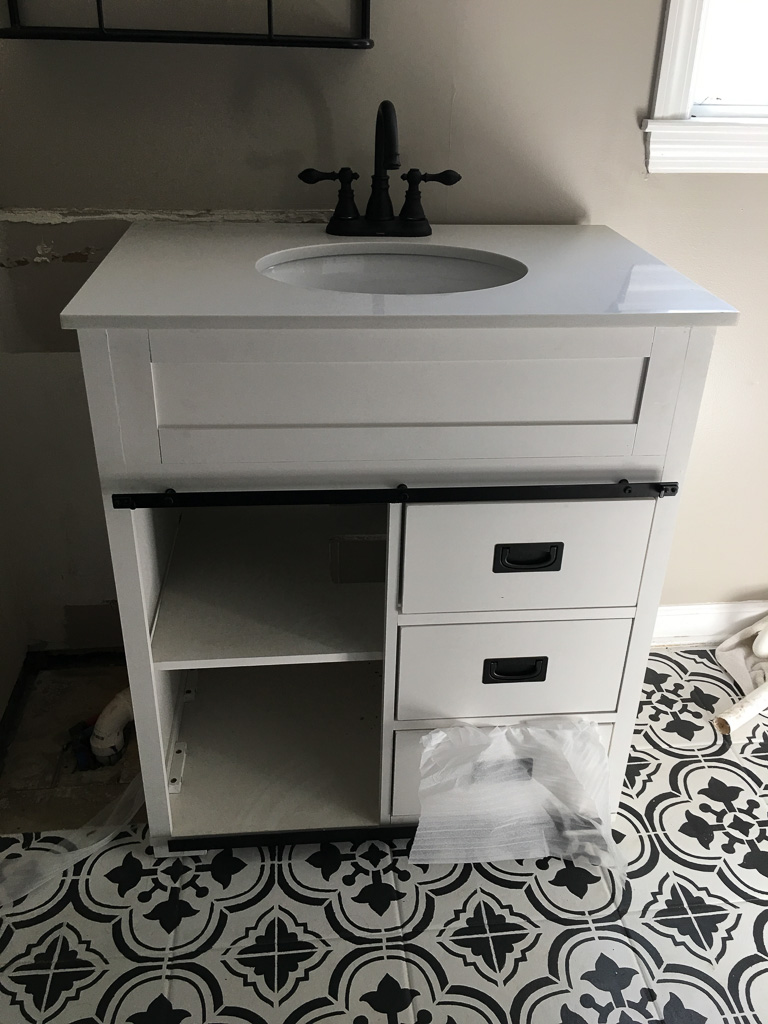
The last thing we did to fully transform this space was swapping out the old vanity with our new one! I could not WAIT for this day. The new vanity had actually been sitting in our arrow barn for a year prior to being installed. I saw it was on sale black friday 2018 and Dan ran to Lowes to scoop it up- good thing, because there was only 1 left! Just because you are not doing a project right at the moment does not mean you shouldn’t be planning for it. If you have something in mind for the future to-do list and you see an element to that goes on sale, grab it! We scored it for half off so it was well worth it. The vanity was the finishing piece to our bathroom makeover and boy did it look good. We had another finished space in our home. It felt so so good to do this on our own and have it turn out so well! I have honed into my style since finishing this room so I don’t think it will remain like this forever, but I am absolutely proud and pumped with how it turned out! Yay to making our house a home- one room at a time.
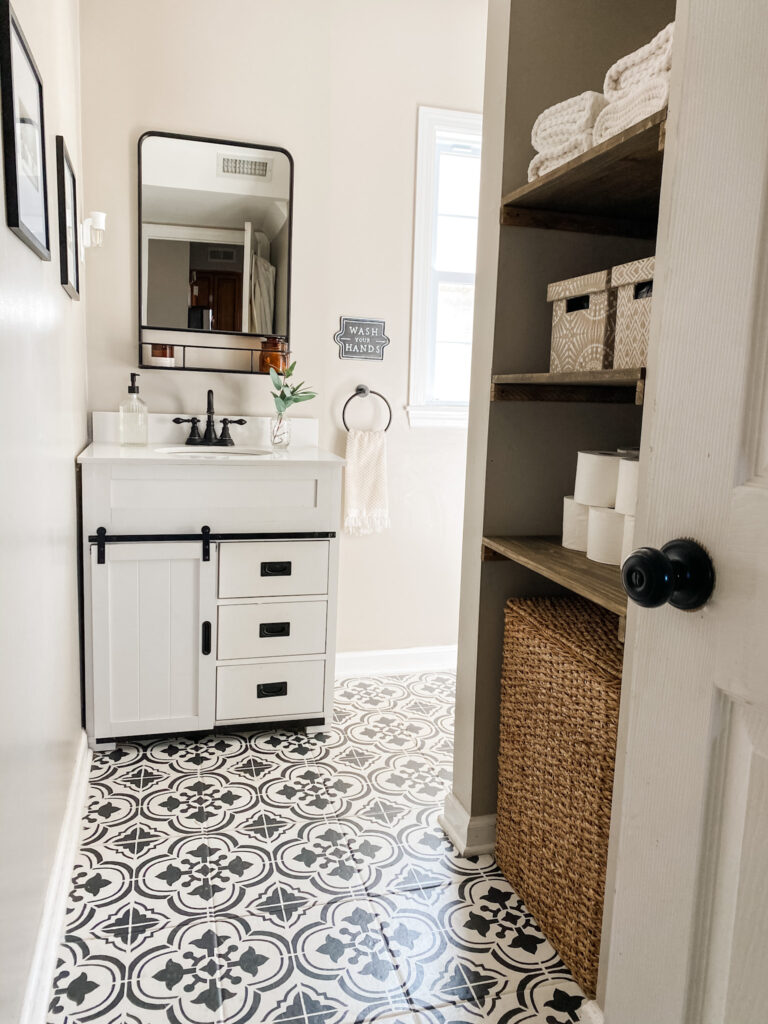
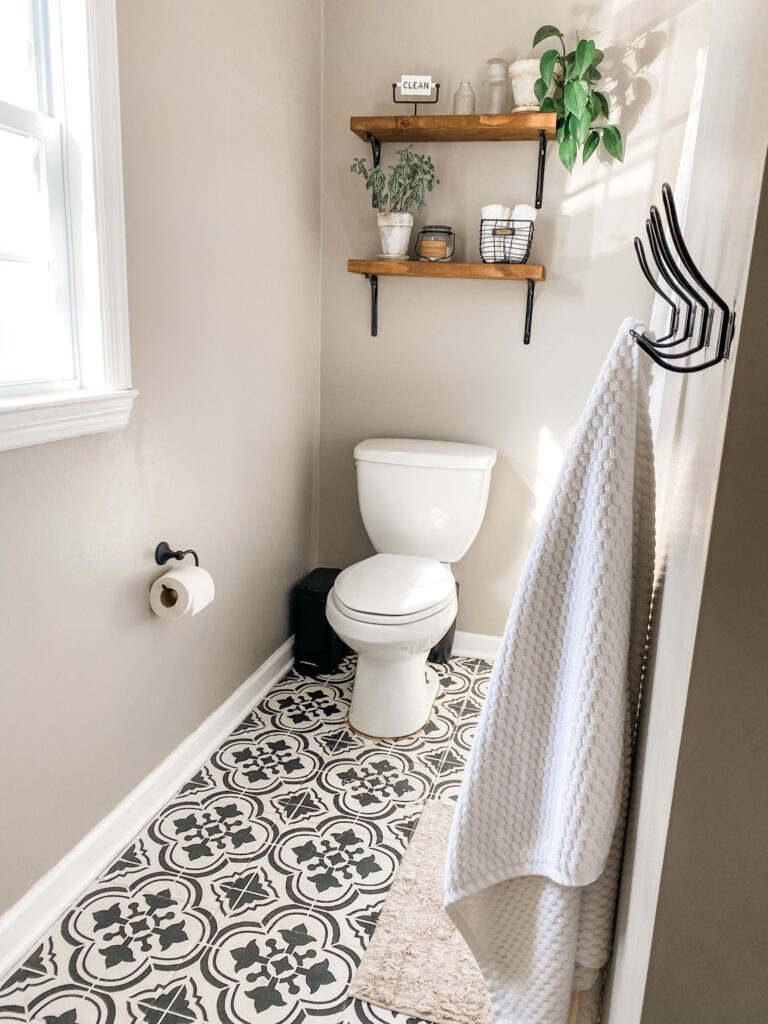
P.S. I bet you’re noticing probably the most dramatic change to the bathroom…THE FLOORS! They were a labor of love and I will be doing a step by step how-to in a blog post soon! So, stay tuned!
Sources:
- Paint: Anew Gray by Sherwin Williams color matched by Lowes
- Lumber for shelves: The Home Depot
- Stain (Jaco Bean + Special Walnut): Minwax
- Shelf Brackets: The Home Depot
- Towels: Target
- Storage bins: Homegoods
- Houseplants: The Home Depot
- Candle: Target
- Bin with washcloths: Hearth and Hand for Target
- Clean/Dirty sign: Hearth and Hand for Target
- Glass Bottles: Target
- Bath mat: H&M Home
- Shower Curtain: Target
- Mirror: Target
- Vanity: Lowes (no longer available)
- Hamper: Target
- Shower Curtain Rod: Bed Bath & Beyond
- Light Fixtures: Amazon
- Faucet: Amazon
- Frames: Wal-Mart
- Towel Hooks: Amazon
- Hand towel ring: Amazon
You can see how hard you worked on your bathroom, a labor of love. I love the colors and the floor is my favorite part