If you have read any of my previous blog posts, you would know about our in-depth bathroom makeover. In that post I shared everything from the paint color, light fixtures, vanity source, how I built our shelves and where my original inspiration came from. What I didn’t share, were the details on our painted tiled floors! I had come across stenciled floors on Instagram, and immediately knew that was how I was going to achieve the look I wanted for our budget friendly makeover. I made sure to take as many step-by-step photos as possible, and to be as detailed as possible, so you too can achieve this look!
First thing’s first- do your research! I watched many how to videos, listened to testimonies, and went from there. I found a stencil company located in my home state of New Jersey to support, “Cutting Edge Stencils.” Their website provides many tips and tricks to painted floors, as well! Once I picked out my stencil, there was not much to do but wait for it’s arrival and continue to gather supplies. So, which stencil did I choose? The Santa Ana Tile Stencil! Man, was it a tough choice! Back to our supply list, here’s what I ended up purchasing to get this project started:
- Santa Ana Stencil
- TSP heavy duty cleaner
- 80 Grit Sanding Block
- Painters Tape
- Primer
- High Density Foam Roller Note: very important for quality results
- Paint Tray
- Stencil Brush
- Rust-Oleum Chalked paint in Charcoal and Linen White
- Clear Interior Polyurethane in Satin
Now, in my opinion and experience, here is a quick overview of why certain supplies are going to give you the best results:
- Stencil: personal taste
- TSP is known to be a great cleaner, I should have used the pre mixed solution.
- You want a medium grit sand paper to make sure your paint and primer properly adhere to the tiled surface.
- Painters tape is a personal preference
- I used Zinsser and liked it, also the stencil company suggested it.
- The high density foam roller is important for stenciling! I wouldn’t even attempt another type
- Use a small paint tray (7″) with a textured ramp to remove excess paint from your roller
- Stencil brushes were great for the smaller nooks of the stencil, and when stenciling around trim
- The actual paint for the floors is also a personal preference- I was happy with Rust-Oleum Chalked
- Very important to use crystal clear polyurethane. I chose satin finish, also a personal preference
Ok, now that we have our supplies, we’ve done some research, and we are feeling GOOD about getting this project started, let’s do just that! The most important step, and I mean MOST important step, is the prepping of your tiled floors. If you do not take your time, and put in some serious effort when prepping your floors, your entire project will fail miserably and it will be a big ole’ waste of time. Now, I did not take any photos of me sanding or cleaning the floors-it’s pretty basic. I went in with the TSP cleaner (I followed the instructions on the box for the powdered version.) Scrubbed the floor, let it dry, than sanded by hand with my sanding block. After sanding, I vacuumed and swept up any dust, and then went in with the TSP cleaner for a second and final time. Prep takes some elbow grease, and if you think it’s clean and sanded enough, probably do it one more time! Prep people, I can’t stress its’ importance enough! After your floors are prepped, it’s time for taping!
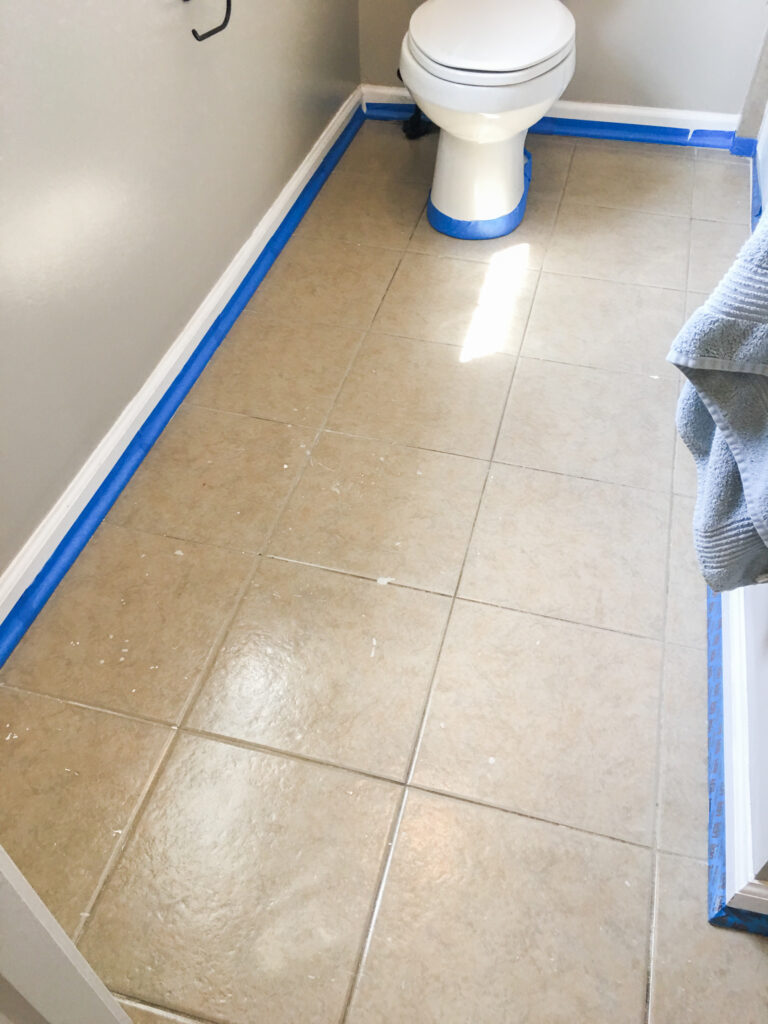
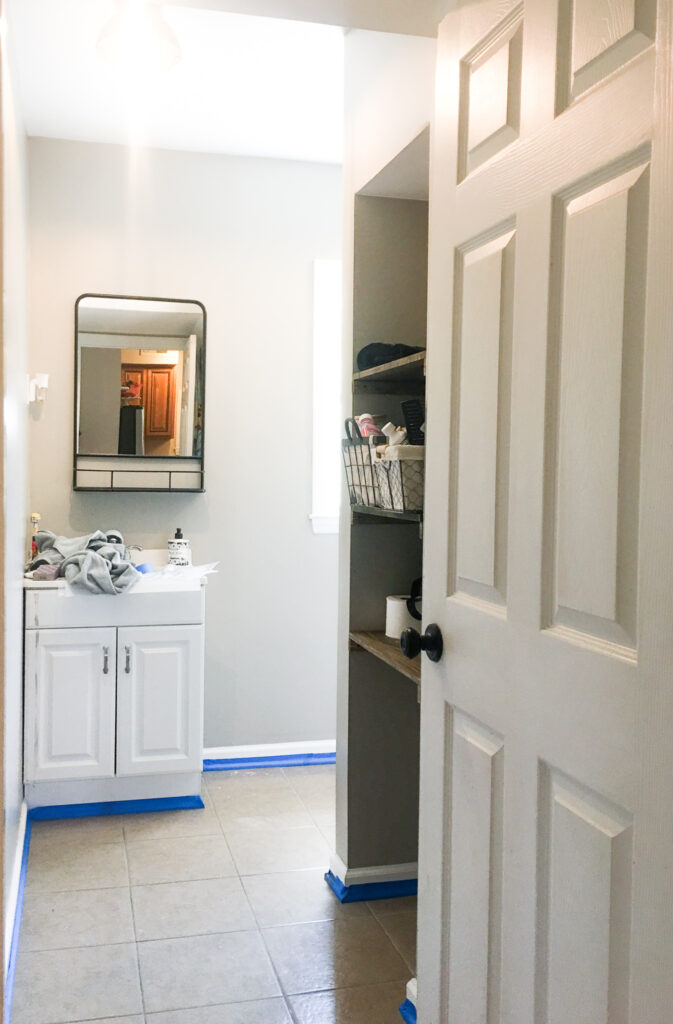
OK! So, at this point, our floors are prepped, anything that can be taped off, is, and we are seriously hyping ourselves up to do the unthinkable- painting our floors to look like expensive tile! I got this, you got this, WE got this! Let’s go.
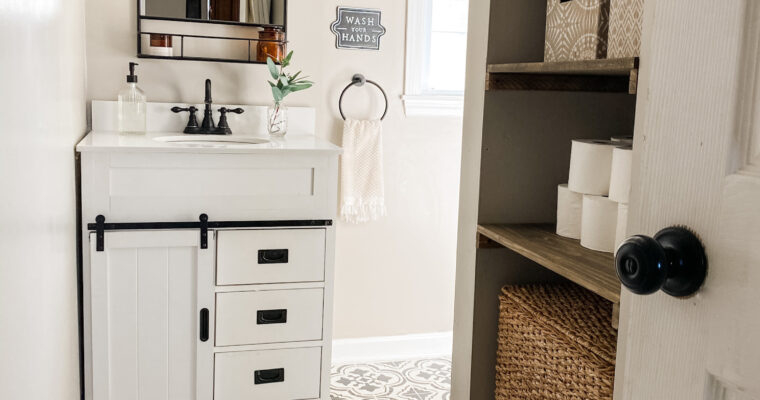
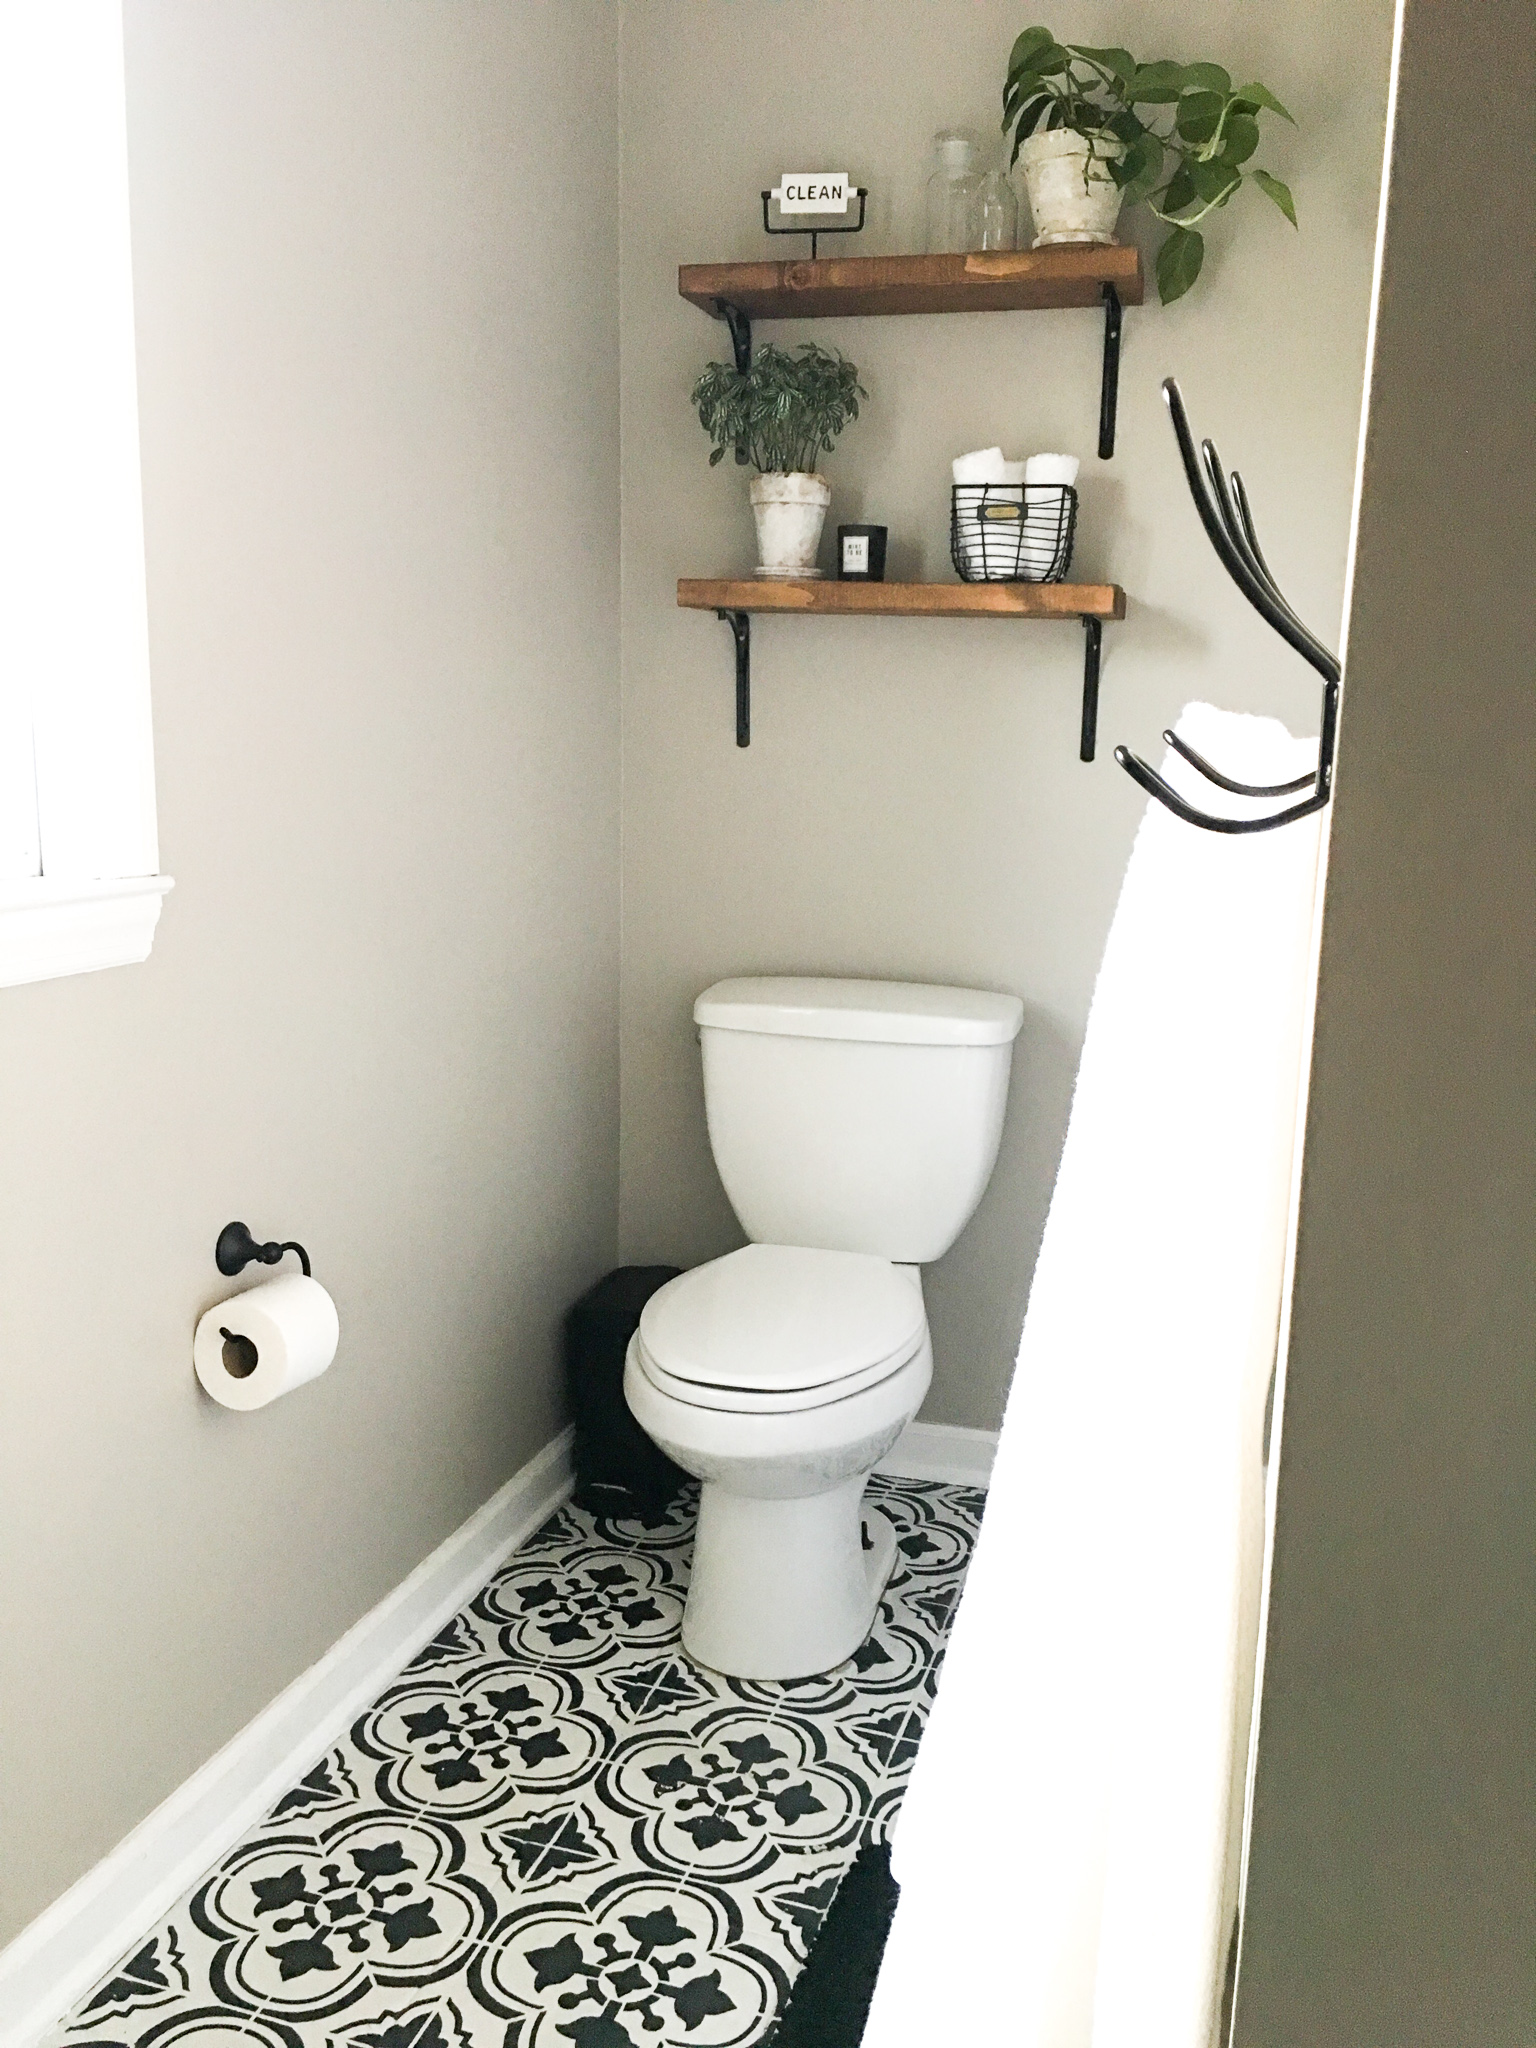
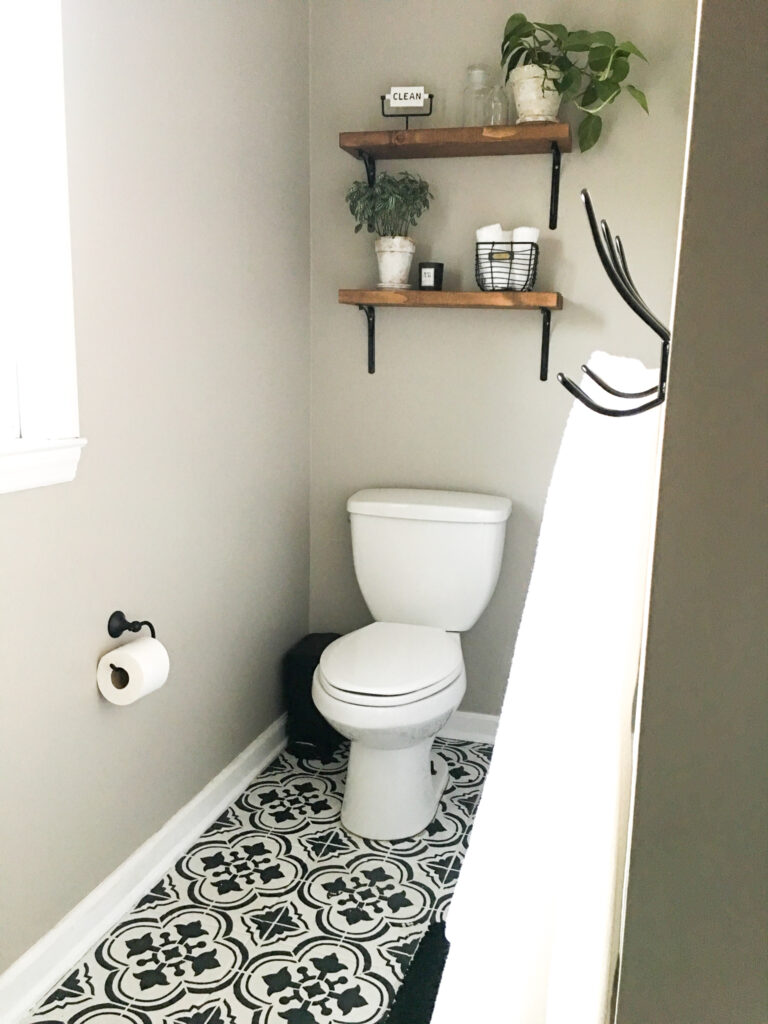
Our bathroom, by the way this is our main floor bath, it’s the bathroom that is primarily used by the kids, guests, and us until our bathroom gets renovated (insert eye roll)- is an “L” shape. Being you can’t walk over fresh paint it’s best to start from the furthest corner and work your way out. So, I started at and around our toilet. What did I start with? Well, the primer! Three coats of it to be exact. Now, the first coat of primer I let cure for 24 hours, painted the second coat the next day, let that cure, and finally the third coat on the third day. Curing is a process of letting the primer bond to the surface on which it’s painted on. The better the bond, the higher chance of that paint sticking!
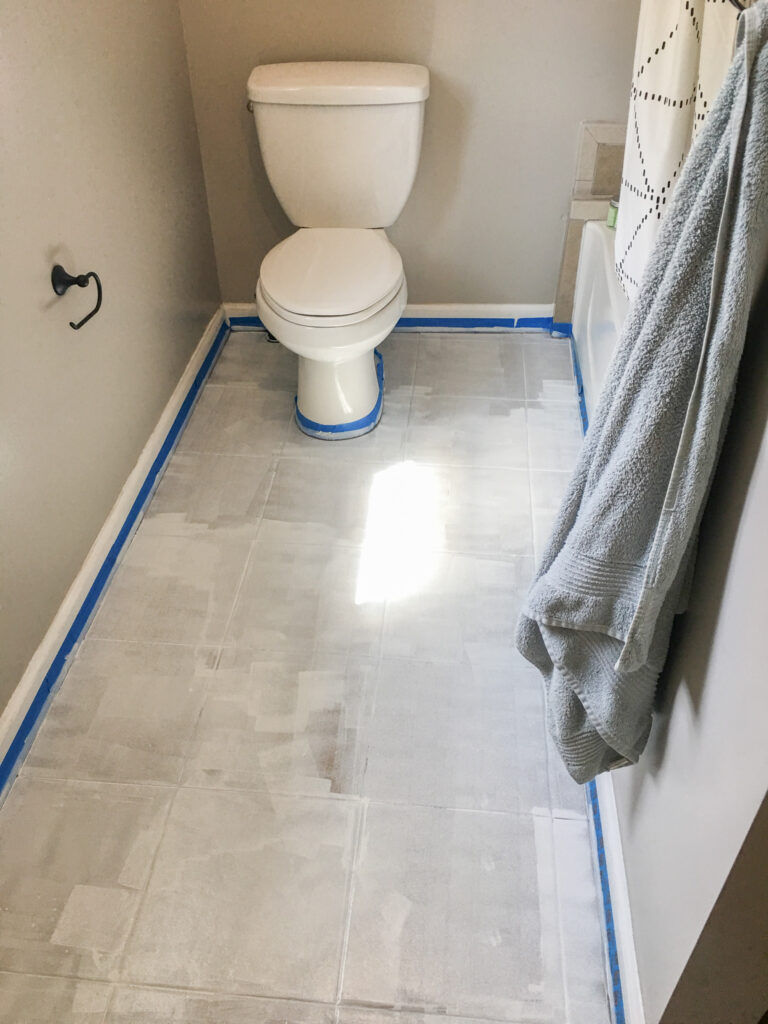
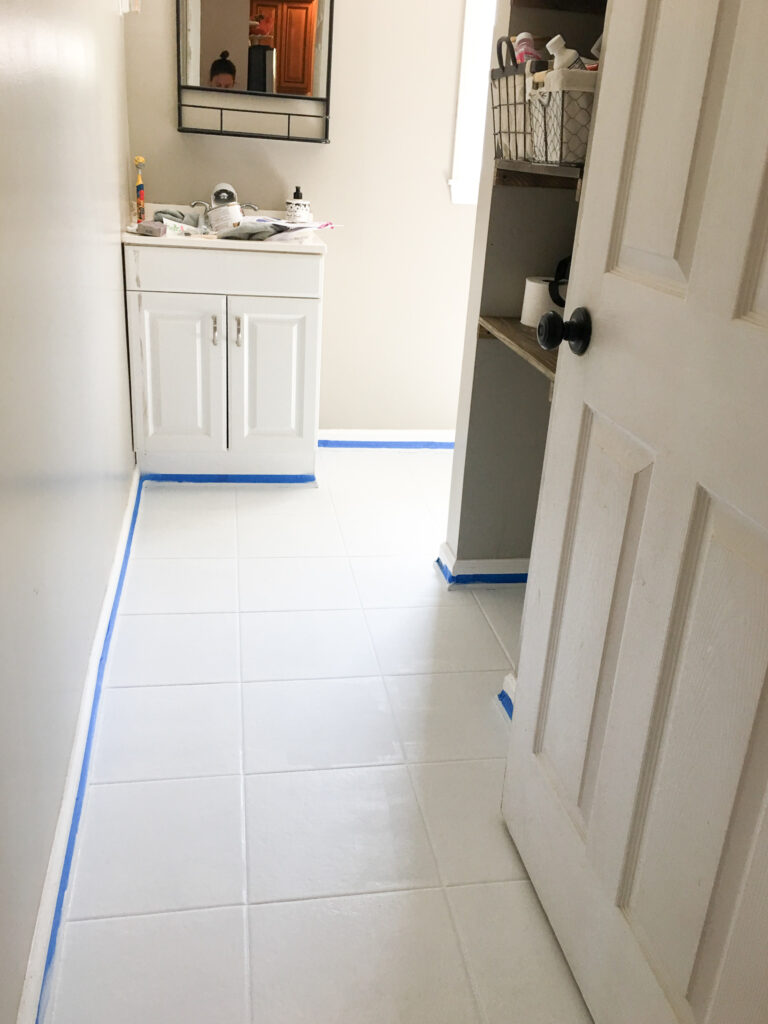
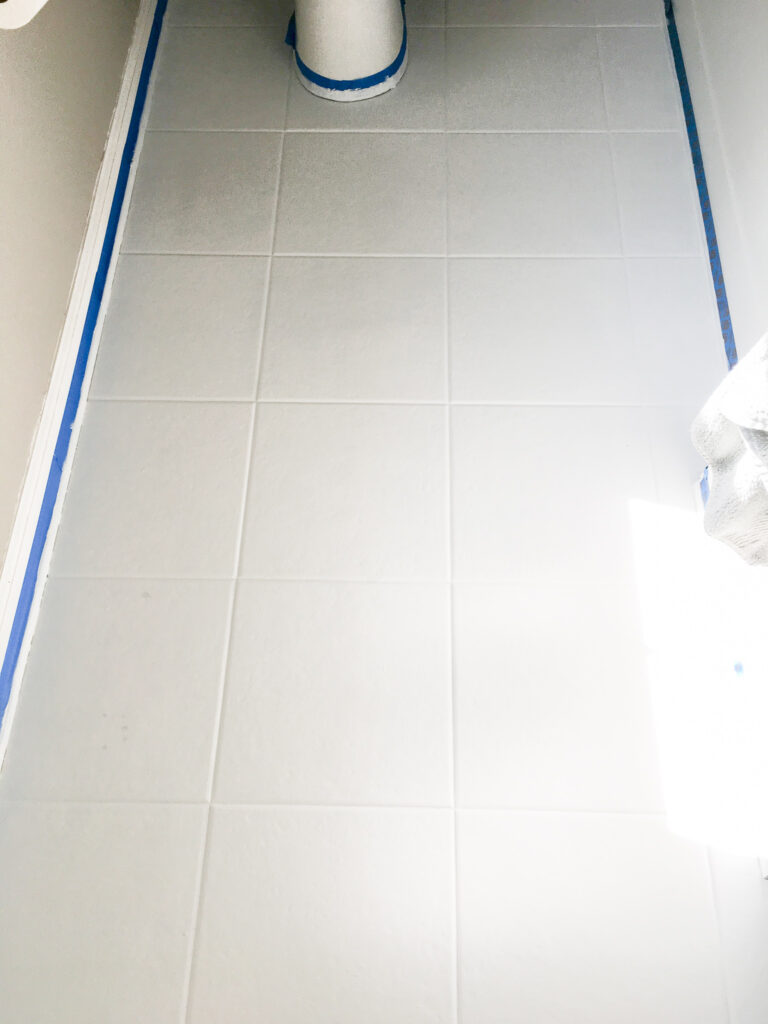
Can we take a moment to appreciate how just the floors painted white has already made a huge difference? This is where I started getting giddy with excitement and my motivation started kicking in. The following day was paint day. Since I wanted the floors to be white and the stenciled part to be black, I would be going over the primed floor with two coats of the Chalked paint in Linen White.
Ok, so you know a minute ago when I expressed how giddy and excited I got once a saw the floors painted white? It ended there. When it came time to the actual stenciling, I was scared to death. Literally finding ways to postpone the stencil, secretly hoping my dog would eat it, or the kids would maybe rip it up, because I was SO intimidated. The thought of going over these beautiful , clean, white floors, and dabbing black paint through a stencil on top of them, ah! the horror. But, it needed to be done, and I WANTED it to be done! During my so-called “research” I read different opinions on where to start on your floor; some would say start in the middle with your stencil and work your way out, some would literally start in a corner and work their way out, me, I just picked a block and rolled with it. I started with the blocks between the bath and the toilet, being its the furthest part from the door. There was no rhyme or reason for which block I would do next, it just flowed. That’s the thing with DIYs, sometimes we can get into our own head so much, that we tend to over-complicate things. I was determined to have fun with this, and repeatedly told myself, it’s just paint! One thing I did stick to, I mainly painted the middle of the floors and saved the hard part for the end, aka- along the walls.
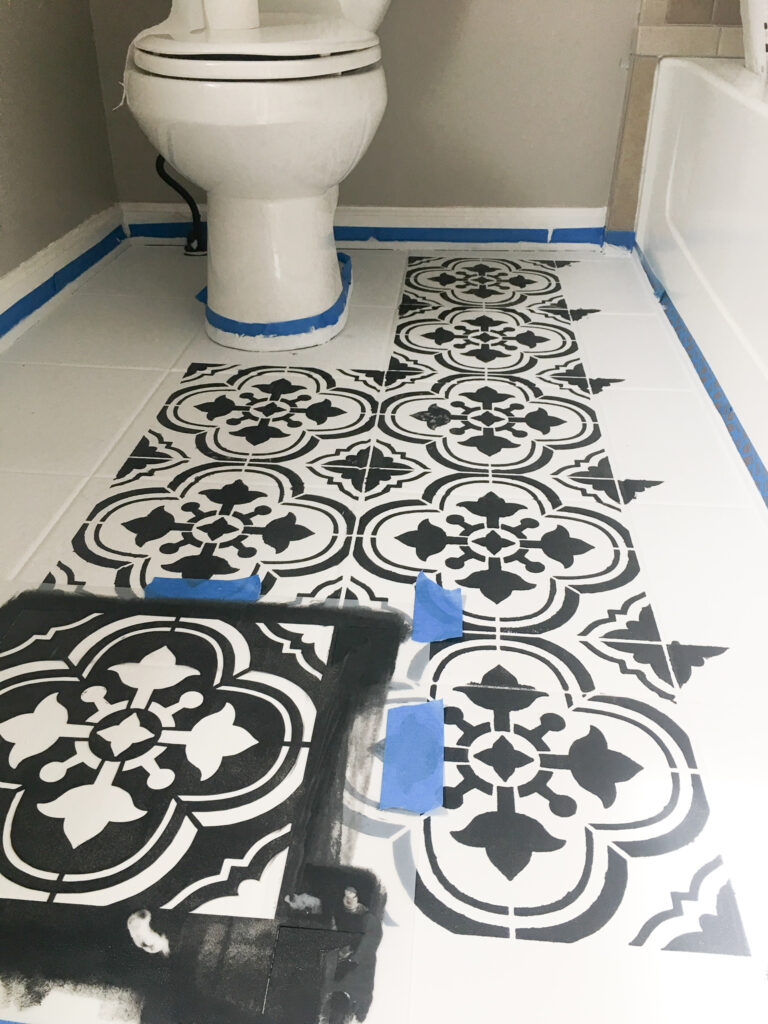
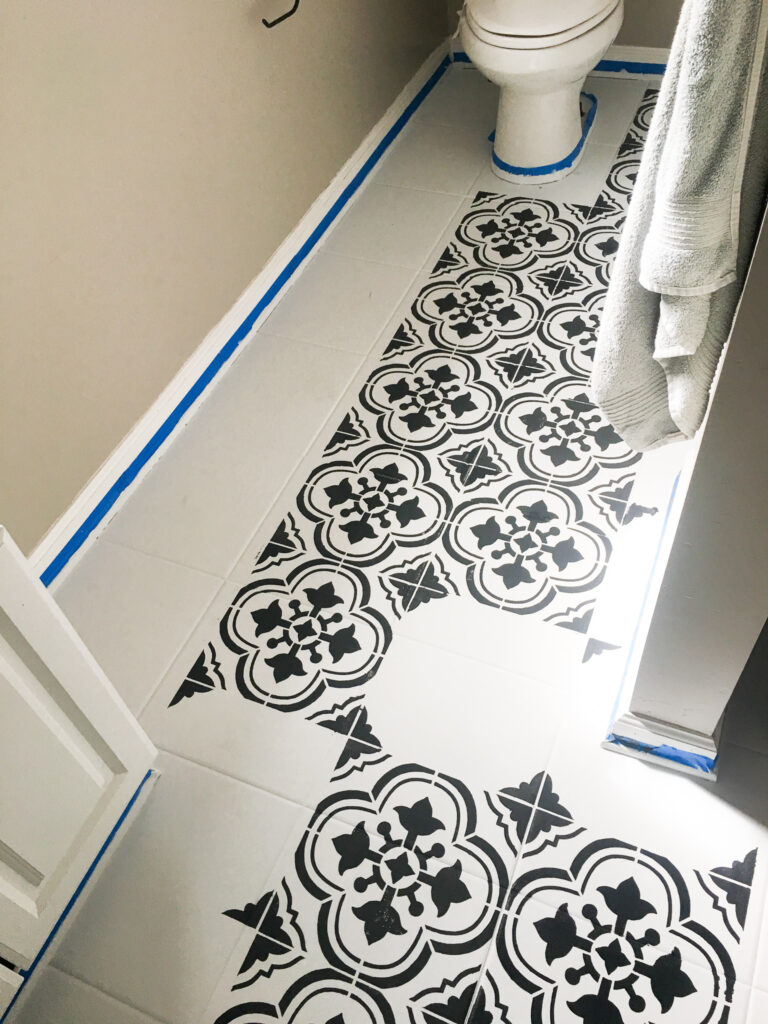
As I began to stencil, I started to get into a rhythm. I was literally learning as I went. When you read about stenciling, one of the important rules of thumb is the less paint on your roller the better. I tried to find out a perfect in between, that took a while. Once you get the paint down, its smooth sailing. And, it’s true. Too much paint will bleed through the stencil and cause blotchy lines instead of clean ones. Take your time, it may not look like enough paint at first, but go over it one more time and it’ll look perfect! Once the middle was beginning to fill up and start to actually look likes tiles, I took a deep breath and began to tackle the edges. In some parts, I was able to use the stencil flushed with the floor, in other parts thanks to our old, lop-sided home, the stencil had to be curved to align with the trim. Curving the stencil can be tricky. It doesn’t always lay flush with the floor and so sometimes you may have to improvise. In the end, I was happy with how the edges were coming along. All the fine details that you are noticing as you are on your hands and knees painting, never get noticed in retrospect! Perfection does not need to be achieved- remember this is a budget friendly makeover that will one day be replaced.
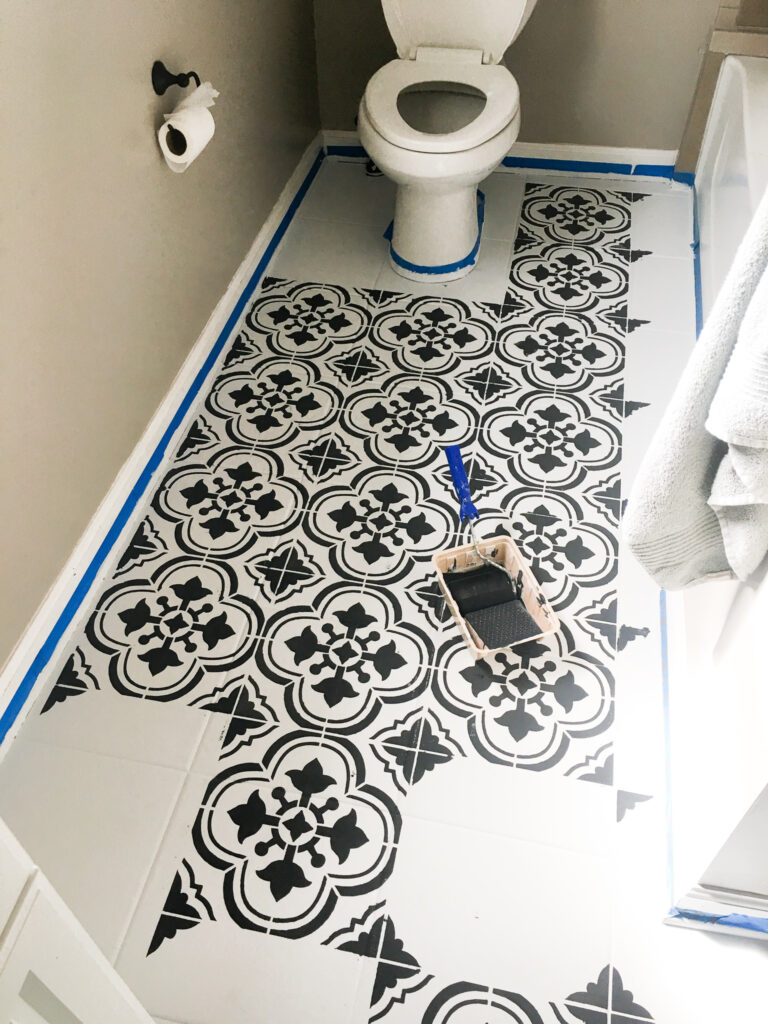
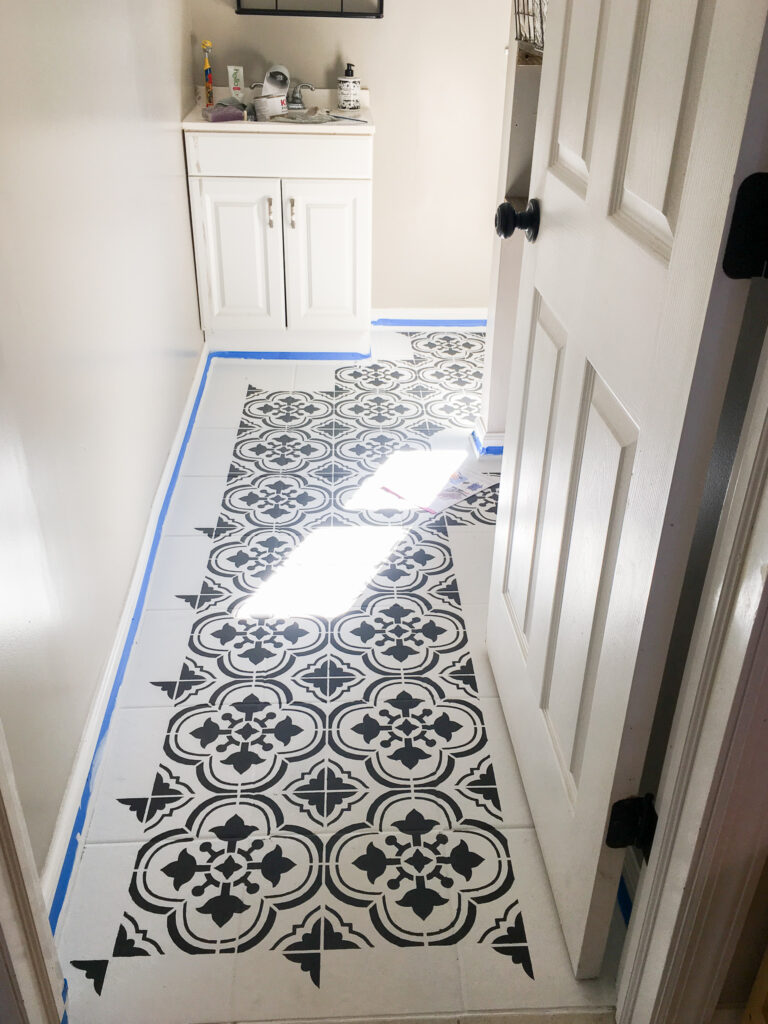
Truthfully, if it weren’t for the edges, the stenciling would have flown by. I tend to be a perfectionist, I was also a pretty good painter in high school and have painted from time to time since, so when things don’t align, or if I know I can do better, than I can sort of spend too much time on one area trying my best to perfect it. As you can see from this progress shot above, things are moving along and it really does look like a beautiful custom tiled floor!
If you look closely at any of the progress pictures, you will see some parts parts that should be black. However, because of the natural grout line in the tile, the roller wouldn’t be able to get into those grout lines. This problem was easily fixed at the end. I went in with a small paintbrush and simply painted those white spots, black. Problem solved! Once the floor was completely stenciled, it came time to seal it. I used the same foam roller and paint tray to do so. Again, make sure you use crystal clear polyurethane so a yellow-ish tint doesn’t come through. I did three coats in total of the clear coat. Just as I did with the primer, I was sure to let each coat cure for a day in between. The finish was exactly what I wanted for a bathroom floor. It wasn’t too shiny nor too matte. After the floor was FINALLY completed came the fun part- decorating, moving in the new vanity, styling the shelves. At last a functional and beautiful bathroom. In total cost of painting the floors was around $150.00 if that! The full bathroom makeover can be found here.
What would I have done differently?
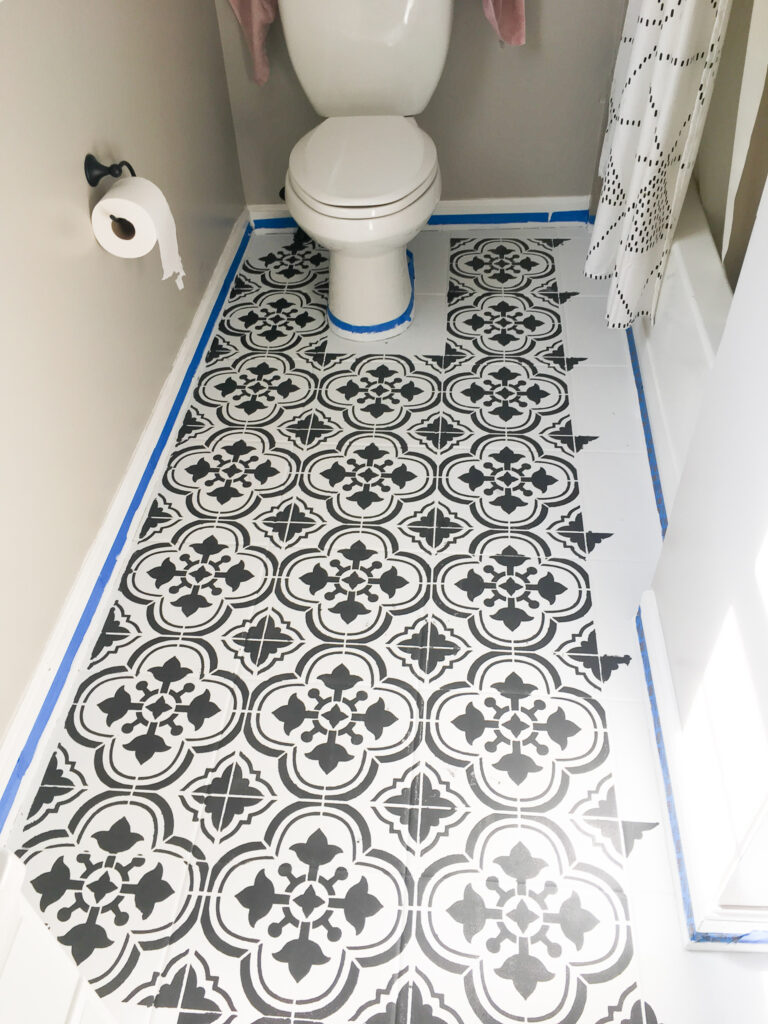
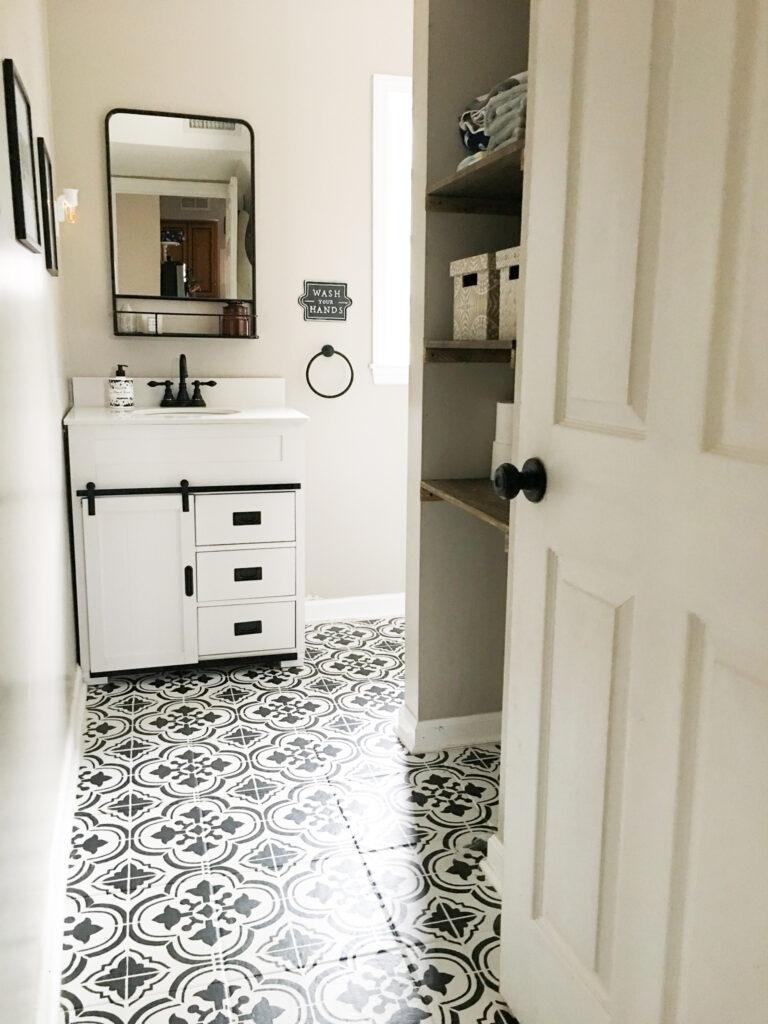
After living with our painted floors for 2 years now, I feel like I can give an honest review and maybe some things to point out to anyone who is wanting to go this route in a makeover. Truthfully, the floors have held up great! Great, in most spots and places. Where there is major needing of touch-ups is around the toilet and bath. To my own fault I used an intense bleach cleaner at the base of our toilet and floor and let it sit to disinfect. Doing that made the paint chip away- lesson learned. What is good to use? Lysol or Clorox wipes work great and still clean well! Any paint that has come up around the bathtub (2 small boys can cause a lot of splash in the tub) all happened within a few months of the floors being finished. I blame it on myself. I believe in that area I could have sanded and cleaned the floor more. Perhaps another coat of poly would have helped. The floor leading to the vanity (shown in the image above) has held up beautifully. Not kidding- it still looks brand new! I hope you take these tips, tricks, and steps to create your own beautiful space that doesn’t have to cost a fortune! And like I mentioned earlier, this isn’t a forever fix, and a for right now one.